Create your own website using AWS s3 bucket
Buy a domain
For my url dodocoding.com I bought it from Namecheap just because I was familiar with this website. You can use any other website to buy this domain (including aws Route53). This is not a mandatory step but the default url for AWS S3 bucket is not very friendly to read so I suggest buying a domain and doing couple of additional setups to make your website have proper url.
AWS S3 bucket
You need to create two s3 buckets for saving static files for your web (one for non-www (this bucket will redirect non-www requests to www one) and one for www traffic) For creating S3 bucket, I won’t go into details as there are lots of materials on the internet for creating s3 bucket for static websites.
AWS Route 53
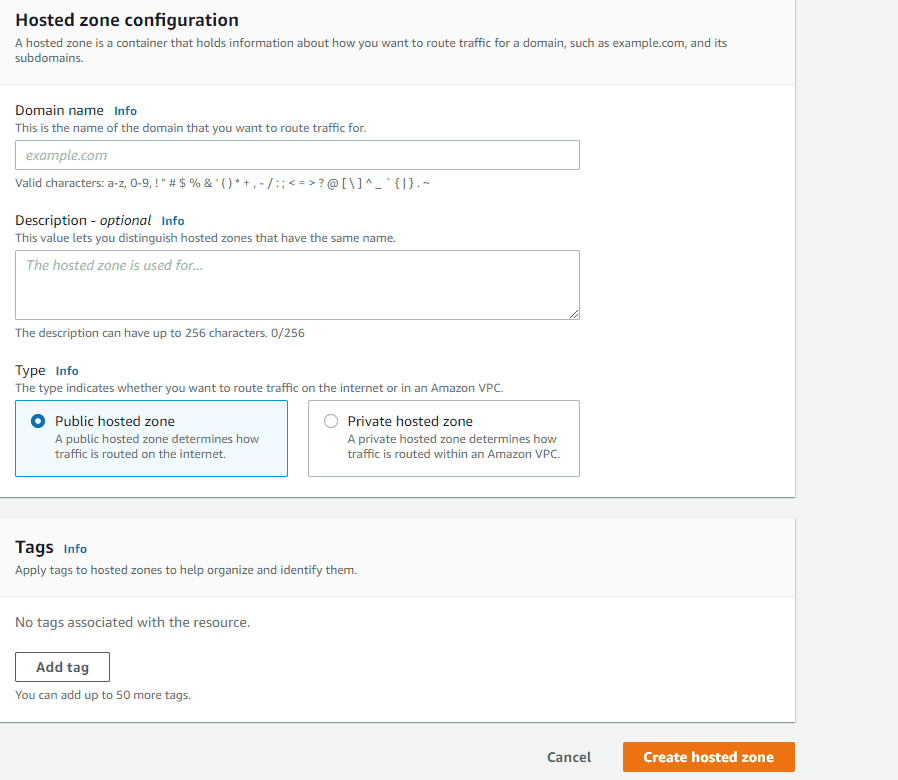
Create a new entry of hosted zone configuration. Go to Route 53 and configure a public hosted zone.

After you create a hosted zone, and click that zone, you will be able to see automatically generated ns(namserver) and SOA records. You need to add them into your domain configuration. Go to Namecheap and under your domain management, you will be able to find Nameservers section. Just add those records in Route53 in the nameserver section as a custom dns.

Wait but what are these nameservers?
It’s a dedicated server to internet find the ip address by the domain name.. like a contact list! By having the NS records, we are telling the internet to go these nameservers to find the ip address of that domain.
Create record for www and non-www
In Route53, let’s create two additional records: one for www and one for non-www. Set the routing policy as simple routing.
First one will be for www, set the record type to be A. Value/Route traffic to field should be set to Alias to S3 website endpoint and from there on set the region you created your bucket in, and the S3 bucket endpoint will appear automatically. You don’t have to evaluate target health so keep that config disabled.
Now, we just need to repeat the same thing over but without www. Don’t set any record name and just create a record type with A. Same configuration as above.
Now after giving it couple of minutes, you will be able to access your bucket with the domain you’ve configured!
However, now the problem is that on your browser, it tells you that your website is not https secure. Let’s configure that!
Issue a certificate for your domain
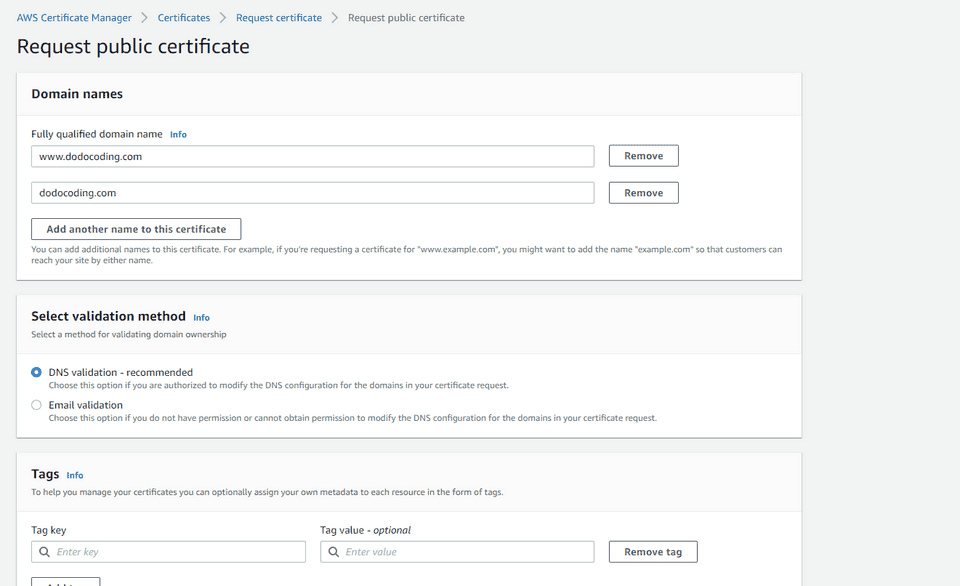
Go to AWS Certificate Manager and request a public certificate. For validation method, let’s choose dns validation.
After you create a certificate, it will ask for your validation on the two domains. Easiest thing would be to click the button that says to create records in Route53 which will automatically generate those CNAME records and finish the validation process. These CNAME will point to the aws certificate.
Make your website https using CloudFront
Using CloudFront will help us utilise Caching and set up https for our domain.
Click create distribution (need to create two distributions, one for non-www bucket and one for www bucket).
For Origin Domain Name field, you shouldn’t trust the auto complete and will need to actually get the proper s3 bucket url (static website hosting url) from the bucket.
Under Default Cache Behaviour Settings you can change Viewer protocol policy and make sure you set it to be Redirect HTTP to HTTPS so every requests that are unsecure redirect to https.
Next in Distribution Settings you want to select Custom SSL certificate and it will autocomplete for you so select that. Also populate Alternate Domain Names and set it to your domain name (with www).
Everything else can just be default (Make sure the state is enabled)
Repeat the process for non-www.(For Alternate Domain Names. Set it to your domain name without www).
One last thing!
We need map CloudFront distribution domain name with our human readable domain names. To do this, we need to back to Route53 and edit the existing A records.
Before we were routing these A records to S3 buckets but now we are changing it so that it routes to CloudFront distribution instead.
Modify the Route traffic to section so that we are using Alias to CloudFront distribution and it will autocomplete the domain name of the distribution! Easy!
Now when you try to access your domain, it will automatically redirect to https with valid certificate.
Remove Caching
When using CloudFront there might be a scenario where you want to remove all the caching.
Go to CloudFront distribution,
- Click on the distribution and click Distribution Settings
- Create Invalidation (It will repull from S3 bucket)
Object path can be /**/*
Reference
Fantastic video from Be A Better Dev which basically helped me set up the whole configuration with dns records and certificate
